How to tighten a loose Shirt without Sewing?
Every wardrobe is bound to have that one favorite shirt, a constant companion that might have loosened over time. Perhaps it was bought oversized with a promise to grow into it, or maybe it has just stretched out from numerous wears. While the thought of picking up a needle and thread might send shivers down the spines of the non-sewing folks, there are creative and surprisingly simple ways to give that baggy shirt a snug fit once more. Dive into this guide, “How to tighten a loose Shirt without Sewing?” to discover ingenious, no-sew methods to breathe new life into your beloved garment, ensuring it remains a staple in your style repertoire.
Related: “How to tighten pants without a belt?” We show eight useful methods for tightening your jeans without a belt.
10 Best Methods to Tighten a Loose Shirt without Sewing
No sewing machine or sewing skills are needed to fix this problem. Ten ways to tighten a loose shirt without stitches are covered in this article.
Method 1: Using Safety Pins
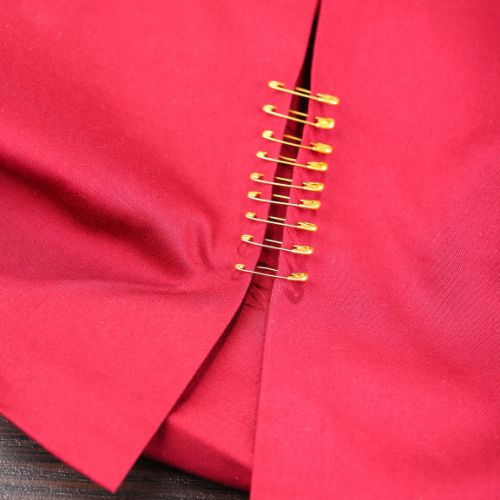
A Detailed Guide on Using Safety Pins
A loose shirt may be fixed quickly with safety pins.
Step 1: Gather your materials you’ll need a safety pin or two depending on how much cloth you need to tighten.
Step 2: Look in the mirror after putting on your clothing. Determine where the clothing is too loose.
Step 3: Gently gather the excess fabric at these points. You want to be able to pinch a small amount of fabric.
Step 4: Insert a safety pin through the gathered cloth from the shirt’s interior to the outside and back again. Your clothing will hide the pin.
Step 5: Close the safety pin carefully, ensuring it’s secure and the sharp point isn’t sticking out.
Step 6: For a better fit, repeat the technique until the pins are uniformly dispersed.
And that’s it! You’ve successfully tightened your loose shirt using safety pins.
Method 2: Employing Fashion Tape

A Detailed Guide on Employing Fashion Tape
Fashion tape is a handy accessory to have for tightening a loose shirt, and using it couldn’t be easier.
Step 1: Purchase fashion tape from a clothing store, online, or a craft shop. Ensure you pick a tape that’s safe for your shirt’s material.
Step 2: Put on your shirt and note the places where it is too loose or where a more fitting appearance is desired.
Step 3: Fashion tape should be cut into required lengths. Use just enough to hold the cloth firmly, but not enough to make it obvious or unpleasant.
Step 4: Stick the tape to the inside of your shirt in the slack spots after peeling off one side of the backing.
Step 5: Once the tape is in position, take off the other side of the backing and push your shirt harder against your body.
Step 6: Check your reflection to ensure the tape isn’t visible and that your shirt now fits as desired.
In just a few steps, you’ve successfully tightened your shirt with fashion tape!
Method 3: Utilizing Elastic Bands
A Detailed Guide on Utilizing Elastic Bands
Elastic bands or hair ties are a clever and resourceful way to tighten a loose shirt. Here’s how you do it:
Step 1: First, find an elastic band. It could be a regular rubber band or even a hair tie.
Step 2: Put on your loose shirt. Look in the mirror to identify the areas where the shirt needs tightening.
Step 3: When your shirt is too loose in the back or on the sides, pinch the extra material.
Step 4: Now, encircle the collected cloth with the elastic band. Make sure the band is just snug enough to hold the cloth in place without becoming unpleasant.
Step 5: Finally, roll the fabric over the band to conceal it. You can adjust the roll to ensure the band is fully hidden and the shirt appears seamless.
And voila! You’ve managed to tighten your shirt effectively using an elastic band.
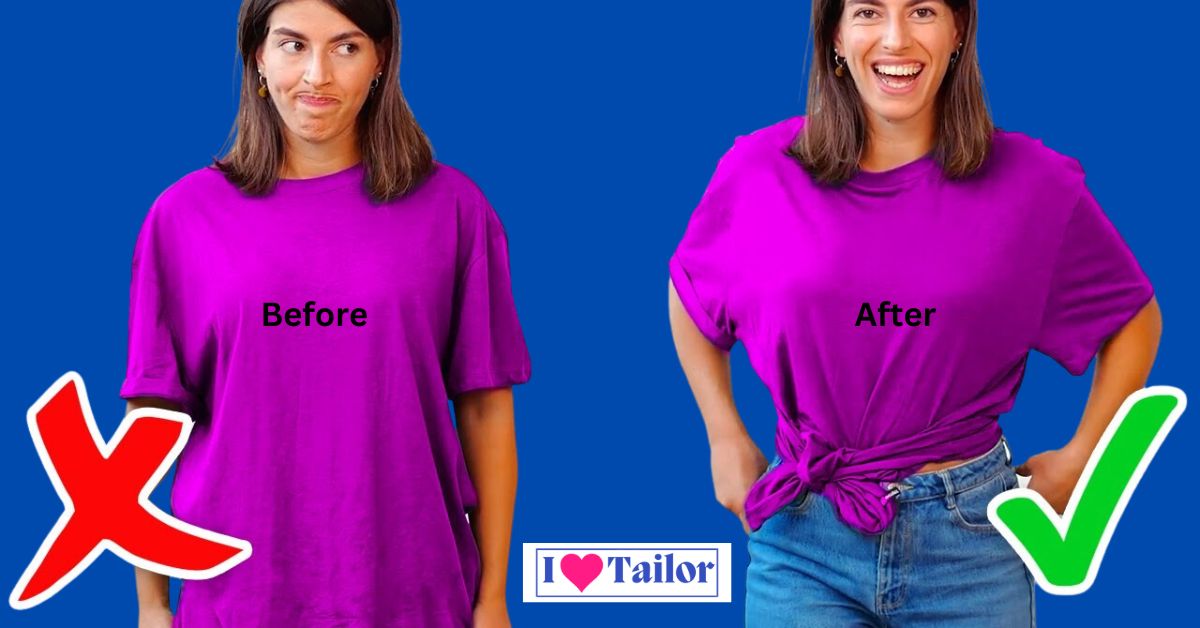
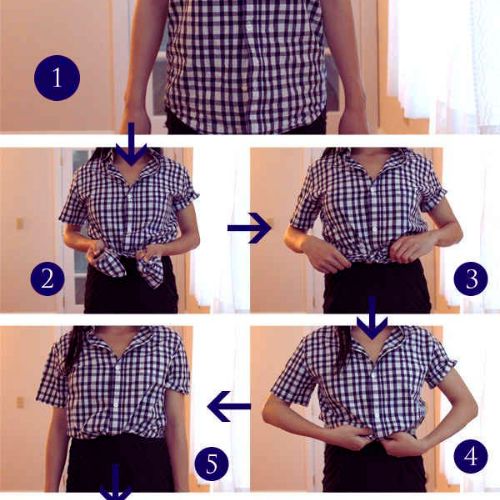
Method 4: Knotting Technique
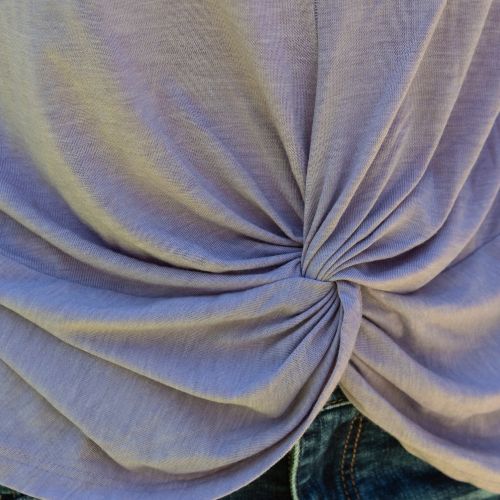
A Detailed Guide on the Knotting Technique
The knotting method is a stylish and simple approach to pulling a baggy garment closer. This is how you do it:
Step 1: To clearly view the results of each move, put on a loose shirt and stand in front of a mirror.
Step 2: Choose the location of the knot. Depending on your desire, it might be in the front, back, or side of your shirt.
Step 3: Take the excess fabric in that area and gather it into a tail.
Step 4: Now, twist this tail until it’s tight, then loop it over itself to create a knot. Adjust the tightness of the knot as needed to tighten your shirt adequately.
Step 5: Check in the mirror to ensure the knot is secure and your shirt fits as desired.
There you have it! You’ve now learned how to use the knotting technique to tighten a loose shirt.
Method 5: The Twisting Method
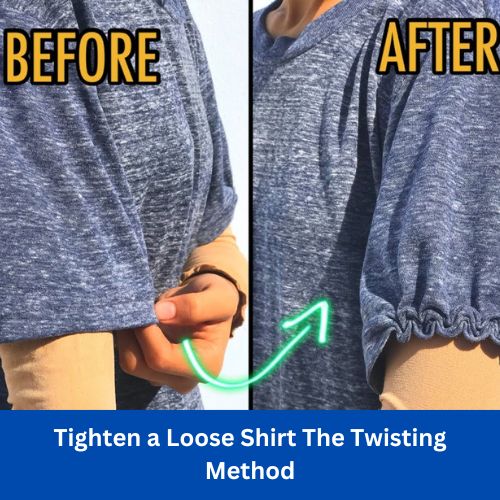
A Detailed Guide on the Twisting Method
The twisting method is another stylish and easy way to tighten a loose shirt. Here’s how you can master it:
Step 1: Start by putting on the oversized shirt and locating the problem spot.
Step 2: Next, collect any extra fabric there; ideally, do this on the front, back, or side of your shirt, where a twist would appear stylish and natural.
Step 3: Once the cloth is collected, begin to twist it until it forms a tight coil. Your shirt will become tighter as you twist more.
Step 4: Secure the twisted coil with a small, discrete rubber band or hair tie.
Step 5: Lastly, adjust the fabric around the twist to ensure it looks even and stylish.
With just a few simple steps, you’ve successfully tightened your loose shirt with the twisting method!
Method 6: Shirt Tuck-In Trick
A Detailed Guide on the Shirt Tuck-In Trick
A simple approach to slim down a loose shirt is to tuck it in. Here’s how:
Step 1: Start with a loose shirt and a bottom item like slacks, a skirt, or shorts.
Step 2: Identify the areas of the shirt that are loose. Usually, these would be around your waist or hips.
Step 3: Now, simply tuck the loose areas of the shirt into your bottom piece. Ensure the tuck-in is smooth and even, so there are no bulges.
Step 4: For a casual look, you could opt for a partial tuck where only one side of the shirt is tucked in, leaving the rest flowing out.
Step 5: Check your reflection to make sure the shirt looks fitted and stylish.
And that’s it! With the shirt tuck-in trick, you’ve easily given your loose shirt a snug fit.
Method 7: Using Belts

A Detailed Guide on Using Belts
Belts are not only for pants or jeans. They can also be used to tighten a loose shirt. Here’s how:
Step 1: Select a belt. It could be a wide, thin, elastic, or buckle belt – whatever complements your shirt best.
Step 2: Wear your loose shirt and identify where you want the shirt to be cinched. Typically, this would be around your natural waistline.
Step 3: Wrap the belt around this area. Make sure the belt fits snugly but comfortably, pulling in the loose fabric of the shirt.
Step 4: Fasten the belt, ensuring it’s secure but not too tight.
Step 5: Adjust the gathered fabric above and below the belt to make it look even and neat.
Step 6: Check your reflection to ensure the belt helps your shirt fit better and adds a stylish touch.
That’s it! You’ve successfully tightened your loose shirt using a belt.
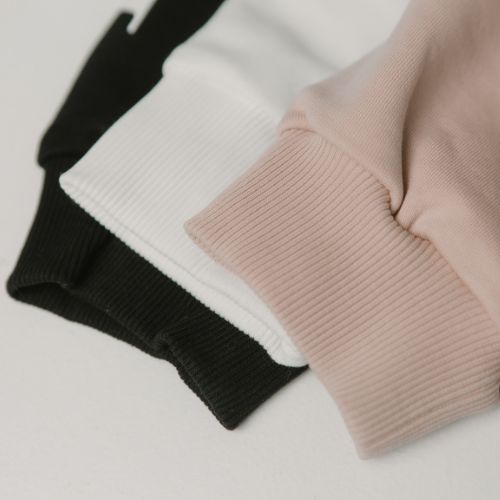
Method 8: Layering Strategy
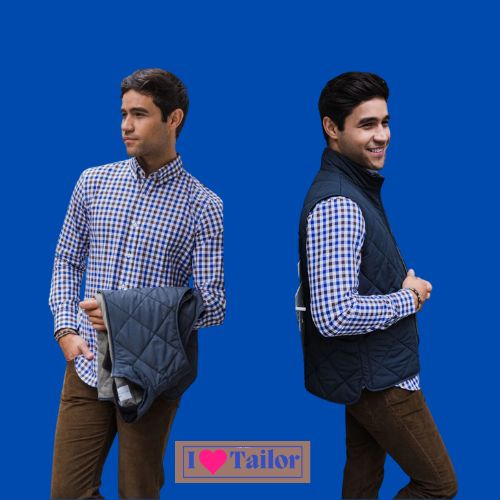
A Detailed Guide on the Layering Strategy
Layering is a fashionable and effective way to handle a loose shirt. Here’s a step-by-step guide on how to use the layering strategy:
Step 1: Start by picking an item to layer under or over your loose shirt. This could be a tank top, turtleneck, or even a dress.
Step 2: Put on your loose shirt, then add the layering piece. If layering under, make sure the layering piece is tight-fitting to provide a snug appearance.
Step 3: Adjust the layered piece so it’s visible and complements your shirt. If you’re layering over, make sure the outer piece is more fitted to give your loose shirt a tighter appearance.
Step 4: Experiment with different combinations. For instance, you could also add a belt over your layered look to enhance the fitting.
Step 5: Check your reflection to ensure the layered look achieves the desired fit and style.
With the layering strategy, you’ve created a chic outfit while successfully managing your loose shirt!
Method 9: Using Clothing Clips
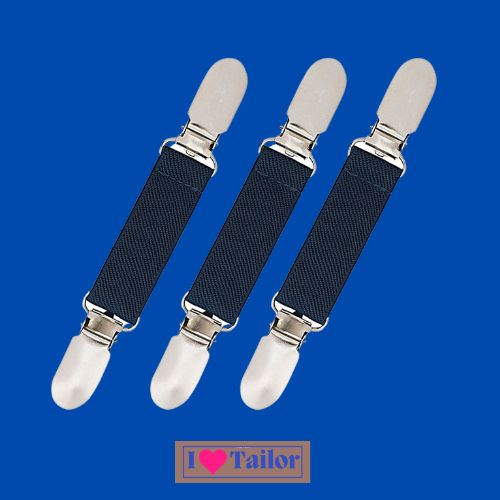
A Detailed Guide on Using Clothing Clips
Clothing clips, also known as cinch clips, are a handy tool to tighten a loose shirt. Here’s how to use them:
Step 1: Buy clothing clips from a fashion store, online, or a craft shop. They come in various styles, so pick one that suits your shirt.
Step 2: Wear a loose-fitting shirt. To find the regions of the shirt that are too loose, take a look at yourself in the mirror.
Step 3: Where your shirt is too loose, gather the extra material at the sides or back.
Step 4: Apply the clothes clip to hold this gathered fabric in place. Make sure the clip is snug enough to draw the cloth in but not so snug that it hurts your skin or harms your shirt.
Step 5: Check the fit in the mirror. If needed, adjust the clip or add more to get the desired fit.
That’s it! You’ve tightened your loose shirt with the help of clothing clips!
Method 10: Body Tape Application
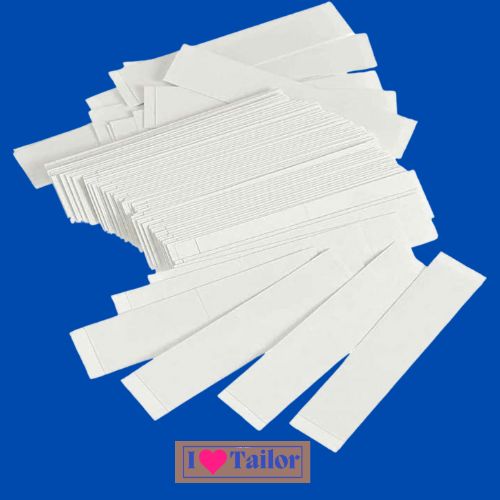
A Detailed Guide on Body Tape Application
Body tape is a secure solution for tightening a loose shirt, providing a more permanent adjustment. Here’s how to use it:
Step 1: Purchase body tape from a clothing store, online, or a craft shop. Ensure you pick a tape that’s safe for your shirt’s material and your skin.
Step 2: Wear your loose shirt and identify the areas where you’d like a more fitted look.
Step 3: Cut pieces of body tape to the desired length. You’ll want to use enough to hold the fabric securely but not so much that it’s visible or uncomfortable.
Step 4: Apply the body tape to your skin where you want the shirt to fit more snugly.
Step 5: Press your shirt onto the body tape, adjusting it to the tighter position you desire.
Step 6: Check your reflection to ensure the tape isn’t visible and your shirt now fits better.
With body tape, you’ve successfully tightened your loose shirt!
How to Choose the Best Method
The best method for you will depend on your shirt’s fabric, the amount of excess material, and your comfort. Experiment with different methods until you find the one that works best for you.
Maintaining the Shirt’s Fit
To keep your shirt fitting well, remember to wash it properly according to the instructions on the label. Overwashing or using a dryer can cause your shirt to lose its shape.
FAQs:
How can I make my shirt tighter fast?
You may swiftly tighten your shirt by knotting it in the front, rear, or side. You may either tuck it into your pants or use a belt to compress the extra cloth.
How can I make my big shirt fit better without sewing?
You can tighten a huge shirt without sewing by knotting, belting, or tucking it. Use body tape, fashion tape, or clothes clips to tighten the fabric.
How do you make a shirt slim fit?
Tie a knot, tuck it in, or add a belt to make a shirt slimmer. Sewing or body or fashion tape may also be used to change it.
How can I shrink my shirt naturally?
Hot water and high heat shrink your clothing naturally. For cotton shirts, this works best. Avoid over-shrinking by regularly monitoring it.
Conclusion
In conclusion, tightening a loose shirt doesn’t have to be a chore, nor does it require specialized sewing skills. With some creative ingenuity, you can repurpose that baggy shirt into a more fitted garment that complements your style. Whether you opt for the hair tie trick for a quick cinch, employ safety pins for a temporary fix, or go for the more lasting solution of fabric glue or iron-on adhesive, there are plenty of ways to adjust the fit without ever touching a needle and thread. As you can see, you don’t need a needle and thread to tighten a loose shirt. With these ten methods, you can easily make your favorite shirt fit perfectly again.
Happy styling!
Thanks!