10 Tips for Sewing With Silk: Cutting & Machine Settings
Silk can make every sewing project special, but it has certain obstacles. Silk’s exquisite shine and delicate drape need precise cutting and machine settings. In this article, “10 Tips for Sewing With Silk: Cutting & Machine Settings“, we cover the basic methods and modifications for sewing with silk. These suggestions will help you master silk trimming, from selecting cutting tools to adjusting sewing machine tension. Are you a seasoned seamstress or a newbie keen to attempt something new? These tips will make your silk creations as immaculate as the cloth. Discover how to easily and precisely turn silk into magnificent sculptures.
Tips for Cutting Silk Fabric

Cutting silk fabric can be a challenging yet rewarding part of sewing, as silk is known for its delicate nature and tendency to slip. To achieve precision and minimize waste, here are some essential tips for cutting silk fabric:
- Prepare Your Workspace: Ensure your cutting surface is clean and smooth. Any roughness or debris can snag the delicate silk fibers.
- Pre-Wash Silk: If your silk is washable, pre-washing it is crucial. This not only removes any finish that may affect how the silk behaves but also accounts for any potential shrinkage.
- Iron Gently Before Cutting: Iron the silk gently using a low heat setting and a pressing cloth to remove wrinkles. Silk is sensitive to heat, so avoid high temperatures and excessive steaming.
- Lay the Fabric Flat: Silk tends to slip and move, so lay it flat on your cutting surface without stretching. If necessary, use pattern weights to hold it in place instead of pins, which can leave marks.
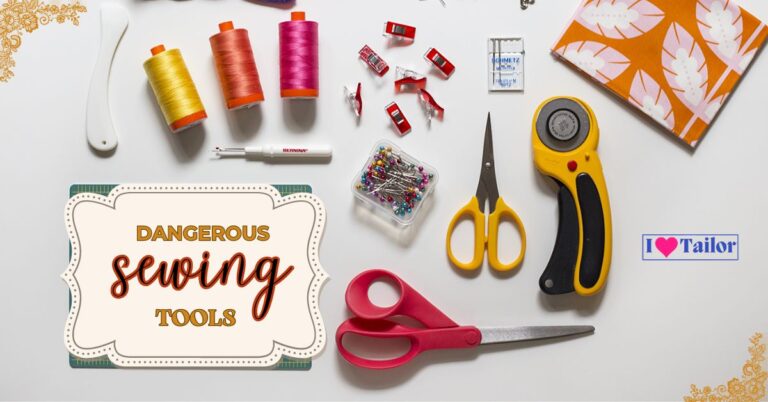
- Use Sharp Tools: Dull scissors or blades will snag and pull at silk fibers. Ensure your cutting tools (scissors or rotary cutter) are sharp and in good condition.
- Cut in a Single Layer: Whenever possible, cut silk in a single layer rather than folding it. This ensures accuracy as the fabric doesn’t shift or move as much compared to when it’s layered.
- Mark Carefully: Use tailor’s chalk or a fabric marker that can be easily removed or won’t be seen in the final garment. Avoid hard pencils or anything that might snag or damage the fabric.
- Support the Fabric: When cutting, support the silk so it doesn’t hang off the table and pull or distort.
- Use the Right Techniques for Different Silks: Heavier silks like dupioni are easier to handle and can be cut like most fabrics, but very lightweight silks like chiffon may require special techniques like sandwiching the fabric between sheets of tissue paper before cutting.
- Stay Patient and Focused: Silk requires patience to cut correctly. Take your time, and don’t rush the process. Accurate cutting is key to the final look of your garment.
By following these tips, you can cut silk fabric more effectively, ensuring a better quality finish for your sewing projects.
10 Tips for Sewing With Silk

1). Pre-wash your silk fabric
Pre-wash silk before sewing to prevent water spots. Check your silk for watermarks before starting. This is difficult since pressing, particularly with steam, is important to stitching any garment, silk or not. Many silk textiles are washable now.
Watermarks are best avoided by washing silk before starting. Water spots vanish after washing. However, washing certain silks somewhat alters the finish. Despite the cost of dry cleaning and spills, I prefer it.
2). Use weights and a rotary cutter
Cut cloth using weights and a rotary cutter. Many silks are lightweight and glide about the cutting board. For the most precise cuts, use pattern weights to anchor the cloth to the board and a fresh-bladed rotary cutter.
Patterns are correctly cut since the weights and cutter keep the cloth still. Using micro-serrated shears is your best alternative without a rotary cutter. Serrated dressmaker shears retain fabric so it doesn’t slide.
3). Test fabric pens
Perform fabric pen testing before marking. Fabric pens may bleed or not vanish on silks, so be cautious. Test before marking. Especially for tailor’s chalk. Pressing melts color but stains cloth. Use tailor tacks or a sharp pencil for seam allowance markings.
4). Avoid permanent marks from pins and needles
Avoid needle and pin marks. Shantung silks have permanent pin and needle holes, thus no do-overs. Prep and fit twice, stitch once! Ripping out a seam leaves markings, so fit everything before cutting out the first pattern piece! Or, hand-baste seams using silk thread to test fit before permanent sewing. (Fabric marking tools: The Best way to mark fabric for cutting)
5). Use the right pins and needles
Use the right pins and needles when sewing with silk. Extra-fine or ultra-fine glass head pins and silk pins are your best options when working with silk as they are less likely to show pinhole marks and they will glide through the fabric preventing any unwanted snags.
6). Use a new needle
Use a new needle when sewing with silk. A new needle will help prevent snags and pulls in the fabric. Choose a needle size that is appropriate for the weight of the silk you are using. A 70/10 or 80/12 size needle is usually appropriate for most silk fabrics.
7). Use a walking foot
Use a walking foot when sewing silk. A walking foot helps to feed the fabric evenly through the machine and prevents the fabric from shifting or puckering. This is especially important when sewing with lightweight silk fabrics.
8). Use a silk thread
Use a silk thread when sewing with silk. Silk thread is strong and has a slight stretch to it, which makes it ideal for sewing silk fabrics. It also has a natural sheen that blends in well with the fabric.
9). Use a pressing cloth
Use a pressing cloth when pressing silk. A pressing cloth will help to protect the silk from the heat of the iron and prevent water marks. Use a dry iron on a low heat setting and press gently. (What is the hottest setting on an iron?)
10). Finish the seams
Finish the seams of your silk garment. French seams, bias binding, and Hong Kong seams are all great options for finishing the seams of your silk garment. These techniques will help to prevent fraying and give your garment a professional finish.
How to sew silk without puckering?

When sewing silk, it is common to experience puckering. However, there are a few tips that can help you avoid this issue. First, hand-baste the fabric together before sewing to prevent slipping and puckering. Second, use a straight stitch needle plate on your machine to help prevent puckering. Third, use extra-fine or ultra-fine glass head pins and silk pins when working with silk to prevent unwanted snags and pinhole marks.
Fourth, use a new needle that is appropriate for the weight of the silk you are using. Finally, use a walking foot to feed the fabric evenly through the machine and prevent shifting or puckering. By following these tips, you can sew silk without puckering and achieve a professional finish.
Sewing Machine Setting for silk fabric: (tension setting)

When sewing silk fabric, the correct settings on your sewing machine are crucial to avoid damage and achieve a professional finish. Silk, with its delicate and luxurious nature, requires special attention, particularly in tension settings.
Tension Setting for Silk Fabric
The tension setting for silk should be lower than what you would use for heavier fabrics. Silk is prone to puckering, so a tension that’s too high can pull the fabric and cause unsightly gathers. A good starting point is to set your tension around 2 or 3. However, it’s important to do a test run on a scrap piece of the same silk fabric to ensure the tension is just right.
Stitch Length and Type
For silk, a shorter stitch length works best, ideally between 2 to 2.5 mm. This helps in creating a more secure seam without bunching the fabric. Use a straight stitch for most seams; however, a small zigzag stitch can be useful for areas that require more flexibility.
Needle and Thread Selection
Always use a new, sharp needle specifically designed for silk or lightweight fabrics, such as size 60/8 or 70/10. The thread should be fine yet strong, such as polyester or silk thread, to seamlessly blend with the fabric without adding bulk.
Presser Foot Pressure
Silk fabrics benefit from reduced presser foot pressure. This prevents the fabric from being stretched or distorted as it feeds through the machine. If your machine allows for adjusting the presser foot pressure, set it to a lighter setting.
Additional Tips:

- Consider using a straight-stitch needle plate and foot for better fabric control.
- If the silk still puckers, placing a layer of tissue paper underneath or on top of the fabric while sewing can help. The tissue paper can easily be torn away once the seam is complete.
- Practice on scrap silk fabric to fine-tune these settings before starting your main project.
With these specialized settings and techniques, sewing with silk fabric can be a smooth and satisfying experience, yielding beautiful, professional results.
FAQs
What is the best sewing machine setting for silk?
For sewing with silk, set your machine to a lower tension, around 2-3, and use a short stitch length, typically 2 to 2.5 mm. This combination prevents puckering and ensures smooth seams on delicate silk fabric.
What iron setting for silk?
When ironing silk, use a low heat setting and avoid steam to prevent water marks. It’s best to iron silk with a pressing cloth for extra protection against heat damage, ensuring a smooth and lustrous finish.
What size needle is best for silk?
For sewing with silk, a size 60/8 or 70/10 needle is ideal. These fine, sharp needles glide through delicate silk without damaging the fabric, ensuring smooth and precise stitching.
How do you sew silk on a sewing machine?
To sew silk on a sewing machine, use a fine, sharp needle and thin thread, set the machine tension lower, and choose a shorter stitch length. Support the fabric well and sew gently, avoiding pulling or stretching. These steps ensure smooth, pucker-free seams on the delicate silk fabric.
Conclusion
Sewing with silk might seem daunting, but with these tips, you can master the art of working with this luxurious fabric. Remember, patience and precision are key to achieving professional, long-lasting results in silk sewing.
Thanks!